The Giebichenstein in 3D
I made a 3D model of the Giebichenstein using photogrammetry. This blog post was written to document the motivation, process and result as well as potential further plans.
What's a Giebichenstein?
Over the last few years, I have been playing with photogrammetry. I have photographed tree stumps, rocks of various size, color and type and also man-made objects like masks and puppets. After a hiatus of about a year from this hobby I thought I should try it again but this time... with something a bit larger than just a tree stump. The "Giebichenstein" is a large rock in Lower Saxony which was deposited there by the glacier movement of the last ice age. It weighs approximately 330 t and is nowadays a minor regional tourist sight and part of hiking tours.
Wikipedia
While visiting it, I checked the Wikipedia pages for it in German and English and noticed that the English version was very short with old and low-res images. I made some edits and thought it would be nice to have a full 3D view of the Giebichenstein.
Capturing a large object using photogrammetry
During the capture of this large object using photogrammetry I have learned some things which I would like to share. I have broken these lessons down into steps.
Image capture
Here are some things to keep in mind while shooting the photos for capturing an object using photogrammetry.
- Preferably pick an overcast day. The cloud layer will disperse the light from the sun, resulting in softer shadows which will in turn produce nicer textures.
- Preferably shoot at around noon time, maximizing the light from the sun. This will allow for shorter shutter speeds, which will produce sharper images more reliably.
- Find ways to capture the object from all angles. While this is not that big of a potential problem for smaller objects, there might be practical concerns when capturing larger objects.
- You can use either a phone camera or a proper digital camera. Just keep in mind that you want your photos as crisp as possible. More detail on the photos means more detail on your model!
- I recommend using a focal length of about 80 mm. Try not to mix focal lengths too much. I can not recommend using telephoto and fisheye lenses.
- Shoot a lot of images but not too many. This one is quite difficult to give concrete advice on but just keep in mind that you have to balance coverage from all angles against potential processing time and resulting file size. If you managed to take thousands of pictures but your machine will collapse when trying to parse them you will not get a result. I do not have any hard numbers here, but usually I end up with 30-100 pictures for small objects and 100-350 for larger ones. For the final try of capturing the Giebichenstein I used 340 images.
- Try not to move anything in the scene while taking pictures. Footprints can not by avoided if you are not using a drone but anything else should stay as unchanged during the capture process as possible. The photogrammetry software is comparing the images to match them to virtual camera positions. Changes in the scene can result in failed matches and "confused" textures. That is also the reason why the lighting of an overcast day is preferable as you will not have to worry about shifting shadows from foliage, etc.
Image sighting and sorting
After capturing the images and transferring them to a computer, take a look at each one and decide if its quality is good enough. Remember: this is technical photography, aesthetics are irrelevant here. It's all about sharpness and sufficient lighting. You can use a regular image viewer like the default one on MS Windows for this. Use the arrow keys to navigate and the "Delete"-Key to delete blurry images.
Photogrammetry
There are different programs out there to use for this step. I used "Meshroom" because it is free and open source. Keep in mind, that you will need a CUDA-capable GPU with sufficient VRAM for this. For the Giebichenstein I used a system with these specifications:
- CPU: AMD Ryzen 5 3600 @ an all core OC of 4.10 GHz
- RAM: 32 GB of DDR 4
- GPU: nVidia RTX 3070 (8GB VRAM)
- SATA SSD storage for the working directory of Meshroom
On this system the process of reconstructing the camera positions, creation of a point cloud, mesh generation and texturing took a total time of about 4.5 hours.
Scene reconstruction using Meshroom
In case you want to use Meshroom too, here is a quick tutorial:
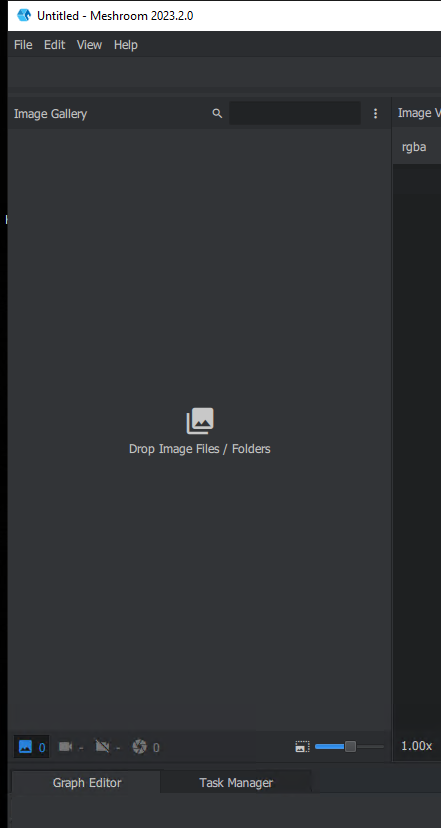
- Download it here: https://alicevision.org/#meshroom
- Unzip it and start it (on MS Windows, use Meshroom.exe)!
- Follow the instructions and drop all your images (using drag and drop from a file explorer window) on this area:
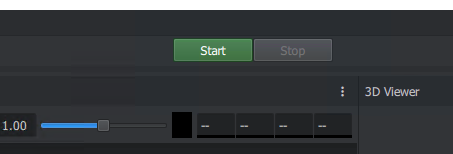
- Save your project using "Main menu -> File -> Save". If possible, use SSD storage for better read/write speeds during the reconstruction process. But beware! Photogrammetry can be quite storage hungry! The Giebichenstein took about 40 GB of storage for this step. Most of it can be deleted after the process is finished, but it will have to be available in the first place, for the process to be able to finish.
- Click the green "Start" button on the top :)
- Now you will have to wait. Depending on the amount of images and your processing power the timespan will vary.
- After the process is finished your window will look something like this:
 On the right side of the window you can see a point cloud representation of the scene and the reconstructed camera positions.
 - Next to the ".mg"-file you saved in step 4 you can find a directory called MeshroomCache. Navigate to MeshroomCache/Texturing/(RandomHexadecimalDirectoryName). In there you can find an .OBJ file wich is your textured reconstructed model. We will switch to Blender and you can close Meshroom now.
Refining the model in Blender
- Open up a new blender project and use File->Import->OBJ to import the textured model
- It might look something like this:
 Notice the artifacts present in the reconstructed model on top of the Giebichenstein? These were created because I was not able to get enough images from high angles. Here the algorithm got confused and merged parts of the trees into the top of the stone. You might run into similar problems, so I will elaborate on how to get rid of artifacts like these. NOTE: Do not apply any transformations your model yet! We will do that later.
 - Switch to either wireframe or solid view and enter Edit mode. Activate X-Ray view and use the selection tools lasso select or circle select (and helpful camera angles!) to select and delete undesired vertices. Additionally, you can use the selection of linked vertices (hotkey L) and selection inversion to delete loose geometry. You can also delete parts of the ground which are not part of the model.
- You will end up with holes in your mesh. Select the areas and use Face->Fill (Alt-F) to fill them. Your goal is to get your mesh manifold. You can utilize the 3D-Printing-Addon of Blender to get hints on what might be wrong your model. You can also use Select->Select By Trait->Select Non Manifold to see vertices that still have problems.

- This can possibly take a lot of time and be quite tedious. You can minimize time spent in this step by getting a good model from Meshroom by putting in good images for reconstruction. This will take some trial and error and personal experience. Do not be discouraged by early missteps. You WILL get better at this.
- Duplicate you model and hide it. This way you can return to it, if something goes wrong.
- Our next goal is to bring the vertex count down, so we can use Instant Meshes to retopologize our model. Instant Meshes does not like models with a huge polygon count and our model likely has one that is way too large. Use Add Modifier->Decimate and Apply Modifier to get your Tris below 1 million. I brought the Giebichenstein down to 680k tris to process it further in InstantMeshes.
- After you have a manifold model that is decimated enough to process it in InstantMeshes, export it to OBJ by selecting it, clicking on File->Export->Wavefront (.obj) and remember to check "Limit to Selected Only"
Using InstantMeshes to retopologize your model
You need to retopologize your model to make it usable. As this is just a static rock which will not be deformed you can use InstantMeshes to get a quick result. Other possible options are Retopoflow or just manual retopology using Blender. Retopology is an important topic and a bit out of scope for this tutorial. I recommend some independent research into the topic.
For the Giebichenstein I used InstantMeshes and some manual adjustments afterward.
- Download InstantMeshes: https://github.com/wjakob/instant-meshes
- Start it and import your OBJ which you exported from Blender
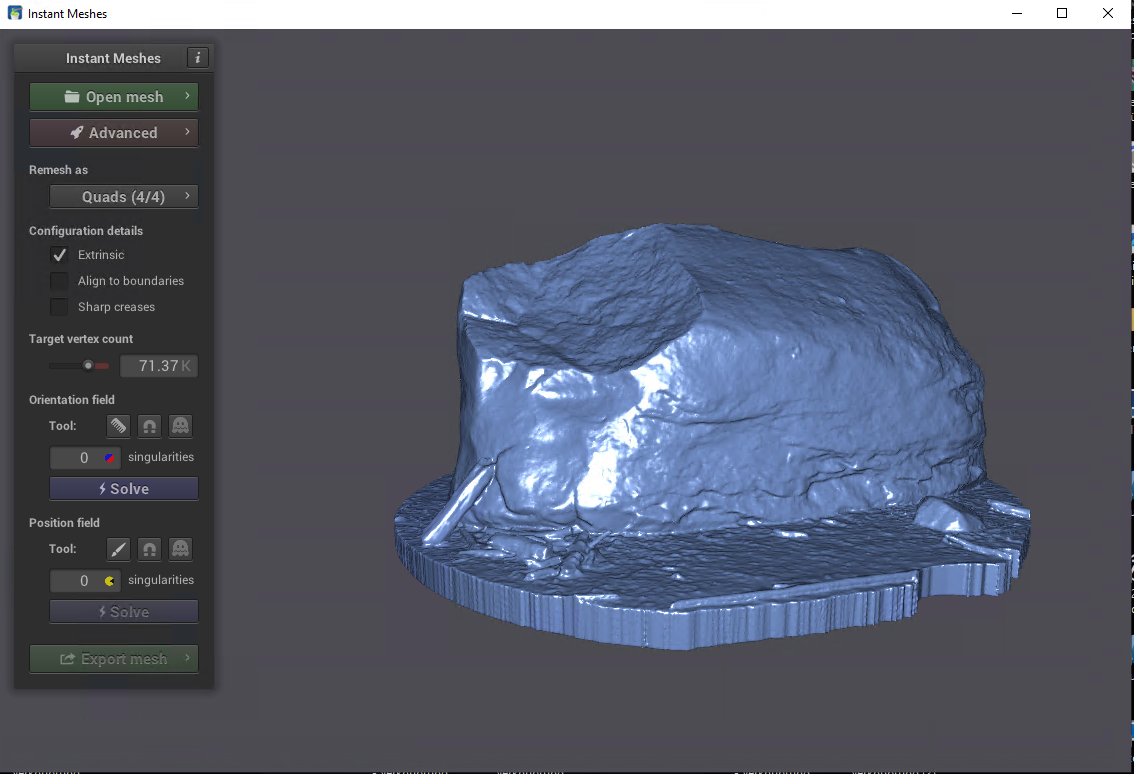
- You should retopologize the model as quads only with a target poly count that fits your requirements. If you are unsure, stick to the default value. Although I personally like to go lower. As you can see in the following screenshots, I lowered the target vertex count considerably from over 70k to about 3.5k.
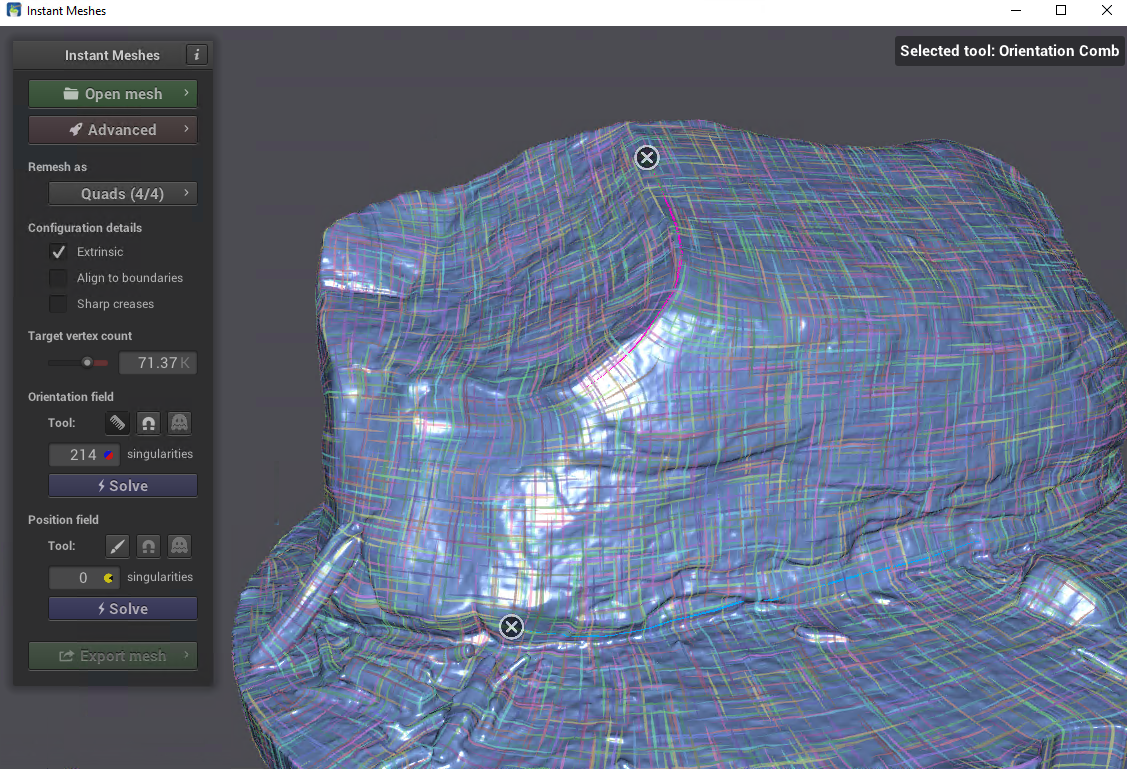
- Use the orientation comb tool to define "flows" of lines on your object like this:
- Click the first Solve button
- Use the edge brush tool to define edges like this:
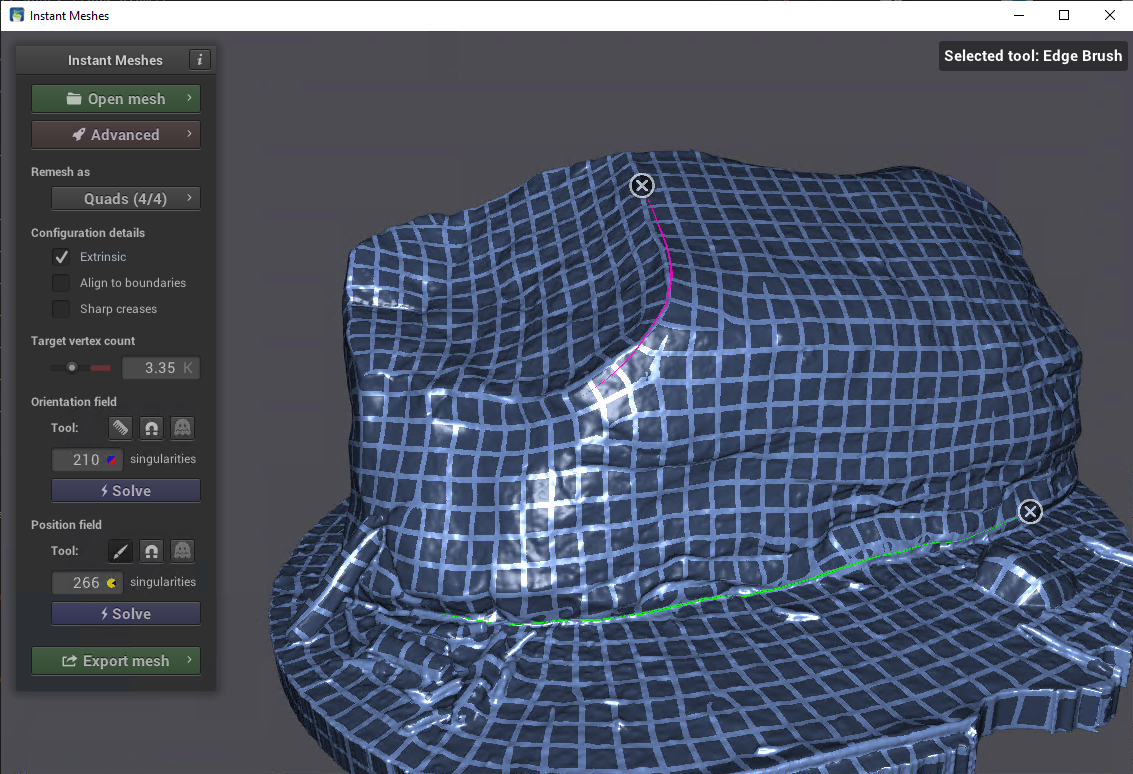
- Click the second solve button
- Click Export Mesh, Check Pure Quad Mesh, optionally set a value for smoothing iterations and click Extract Mesh
- Click Save and save it to different OBJ file
UV Mapping in Blender
Now we will tackle the topic of textures and normal maps. Our overall goal is to bake the high resolutions textures from our initial model into a nice clean texture and extract all the surface details geometry into a normal map, which we can then project onto our retopologized model to fake all the detail at a fraction of the model complexity. The first step to achieve this is to get a proper UV map.
- Import the model we got from InstantMeshes or use a retopologized model retrieved by applying another technique.
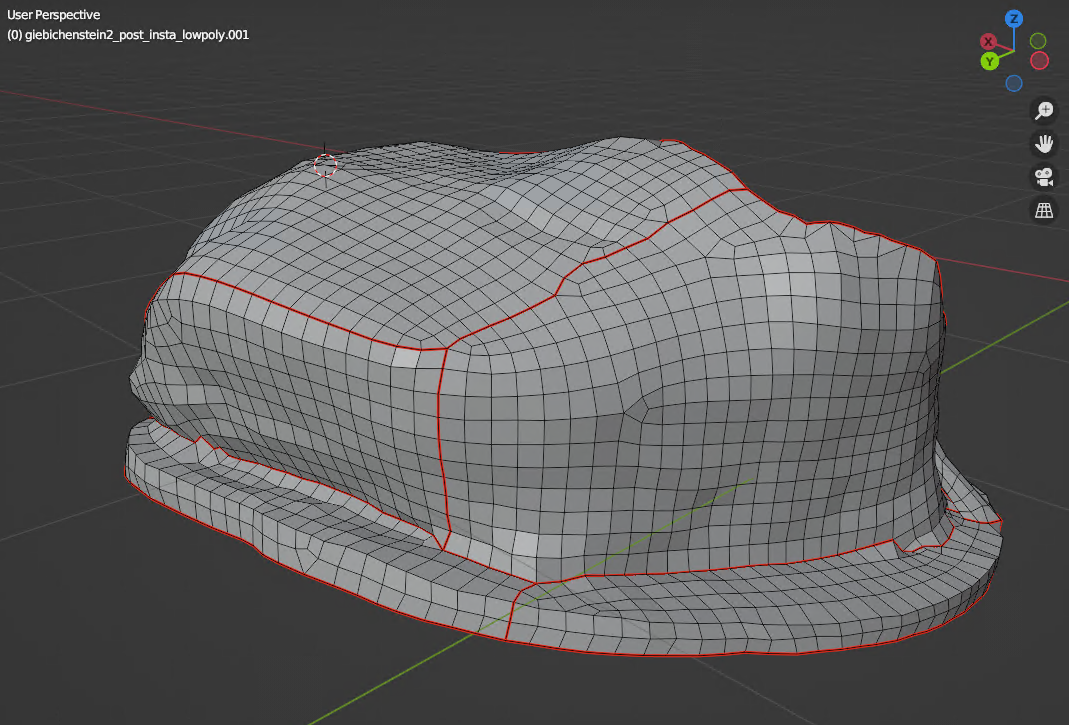
- If necessary, tweak your model, should any simplification during the automatic retopology messed up your model. On the Giebichenstein I had to tweak the model for the log that is leaning on the stone.
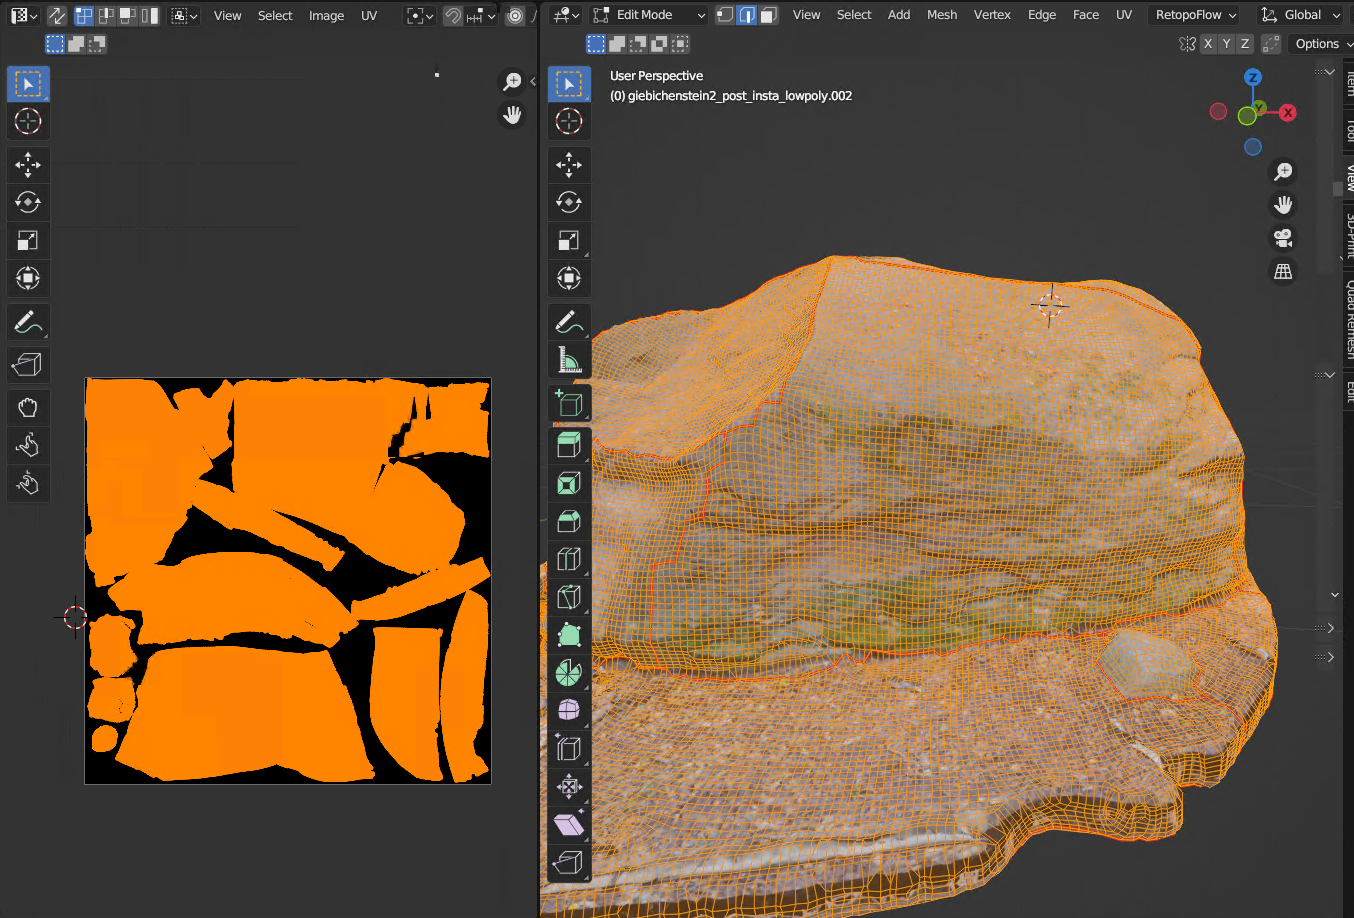
- Enter edit mode, and mark edges as seams. Your goal is to "cut" your whole model up into patches which can then be placed on a UV map. Try to hide these seams in rims (if possible!). Also keep this in mind when placing seams: the resulting areas will be flat on the texture, so try to keep the areas on the model as flat as possible as well to achieve a similar level of clarity for all faces of the model. For the Giebichenstein I decided to cut it up roughly in a way that separates the ground and the stone and that isolates several flat faces on the stone.
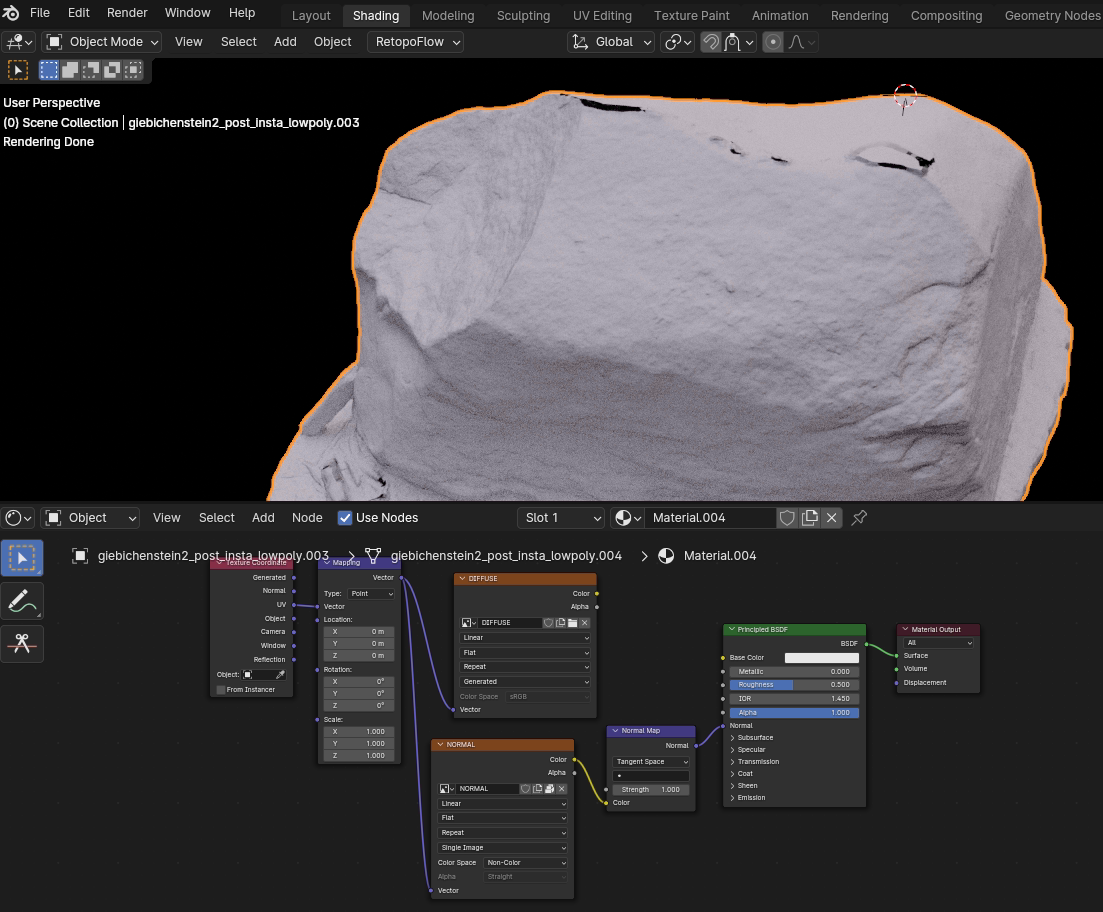
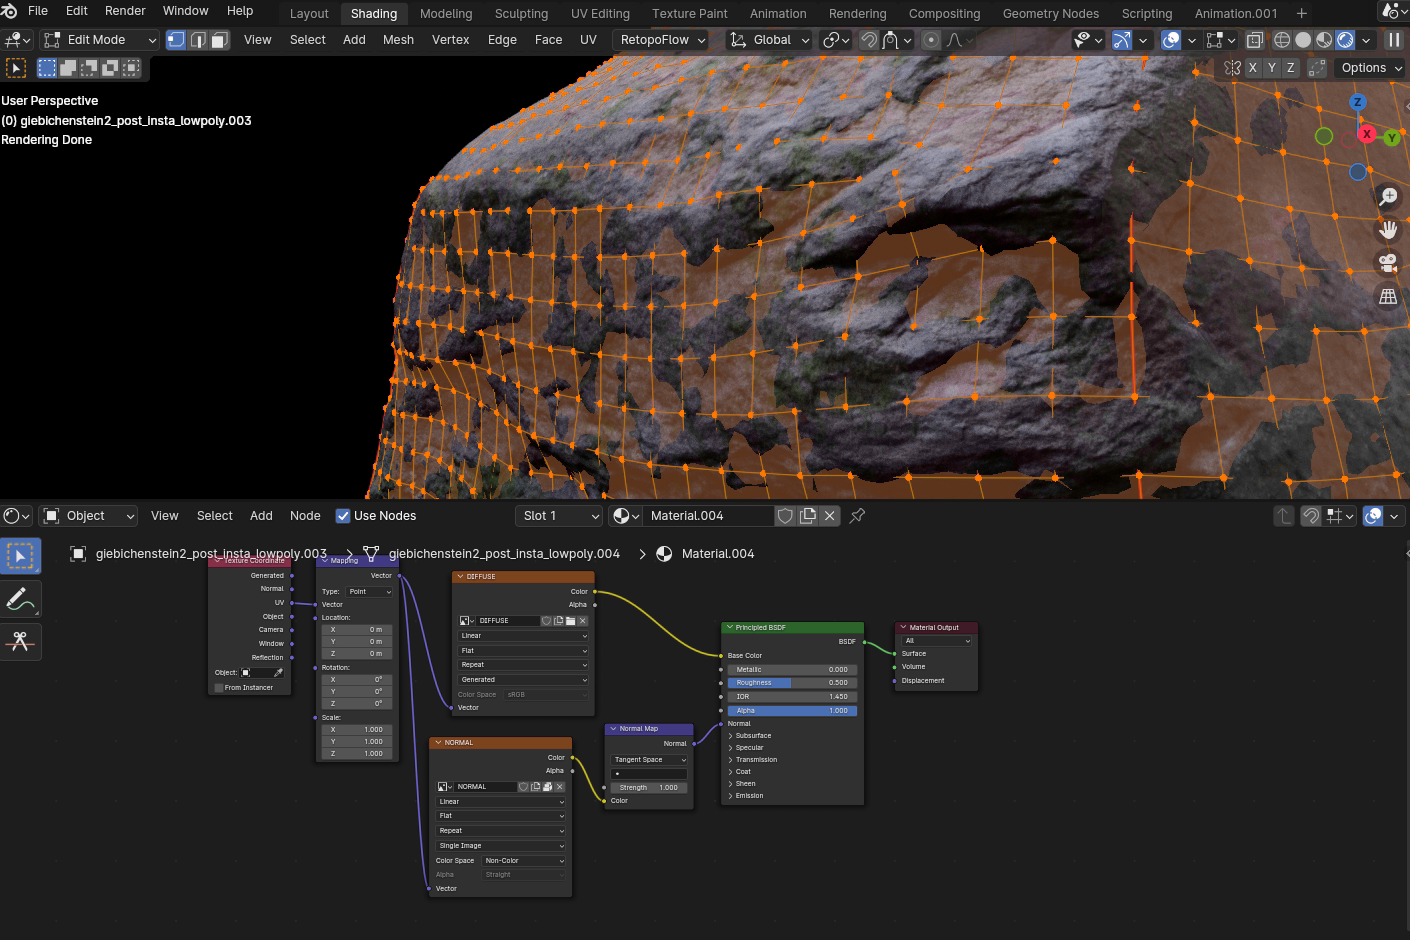
- Switch to the Shading tab in Blender and create a new material for the retopologized model. Add an image texture for the colored texture and one for the normal map. Here are the nodes that I used (the "Node Wrangler" Addon can make this faster):

- Use a texture size that fits your desired level of detail. I used 8k textures for the Giebichenstein because it is quite large! Remember to set the color space for the normal map to "non-color"
- Switch to the UV Editing tab of Blender
- Enter Edit mode, Select all, Use (right window) UV-> Unwrap
- You can use (left window) UV-> Pack islands to pack the islands into the texture plane. You should end up with something like this:
- You can adjust the islands to your liking. Remember: The smaller the size of the island on the texture, the less detail it will be able to contain, as the number of available pixels is also smaller! Also try not individually scale the islands as this will result in differing levels of detail on your model.
Baking textures in Blender
Now that we have a retopologized model with a UV map it is time to grab the texture from our original model and all those sweet, sweet details as a normal map.
- Open the render settings for your project
- Use these settings (or modify them to your liking):
- Render Engine > Cycles
- Device > GPU (if you've got an nVidia card, that can be utilized; the resulting bake time will be lowered!), or CPU (if not)
- Light Paths > Max Bounces > Total: 4, Diffuse: 4, Rest: 0
- Caustics > Deselect all
- Samples: 1024
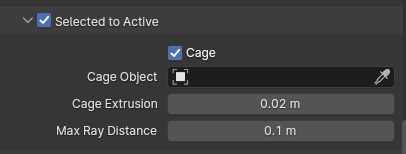
- Bake > Selected to Active (checked), Cage (checked), Cage extrusion: 0.02m (adjust until you do not get any texture artifacts in folds)
- Bake > Output > Target > Image Textures
- Bake > Bake Type > "Normal"
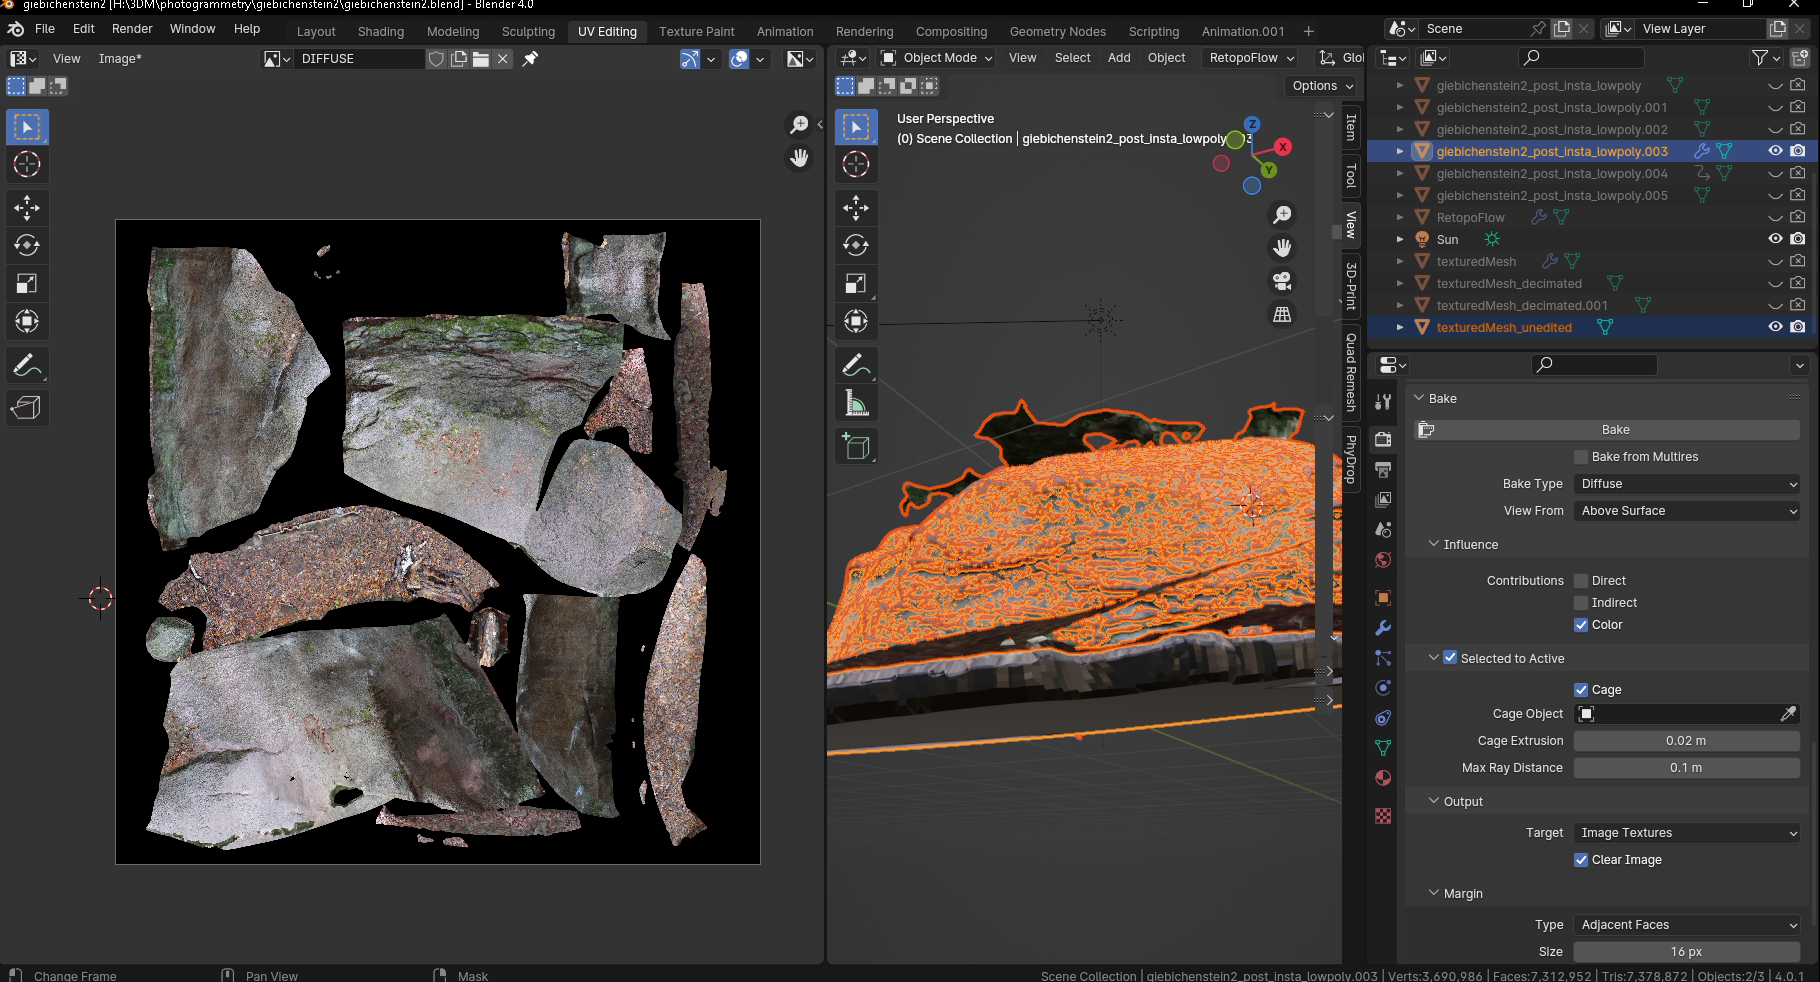
- Select the original textured "high-res" model, hold the "Control"-key on your keyboard and then select the "low-res" retopologized and untextured model.
- Select the shader node for the normal texture and click the "Bake" button to start the texture baking of the normal map. See this image:
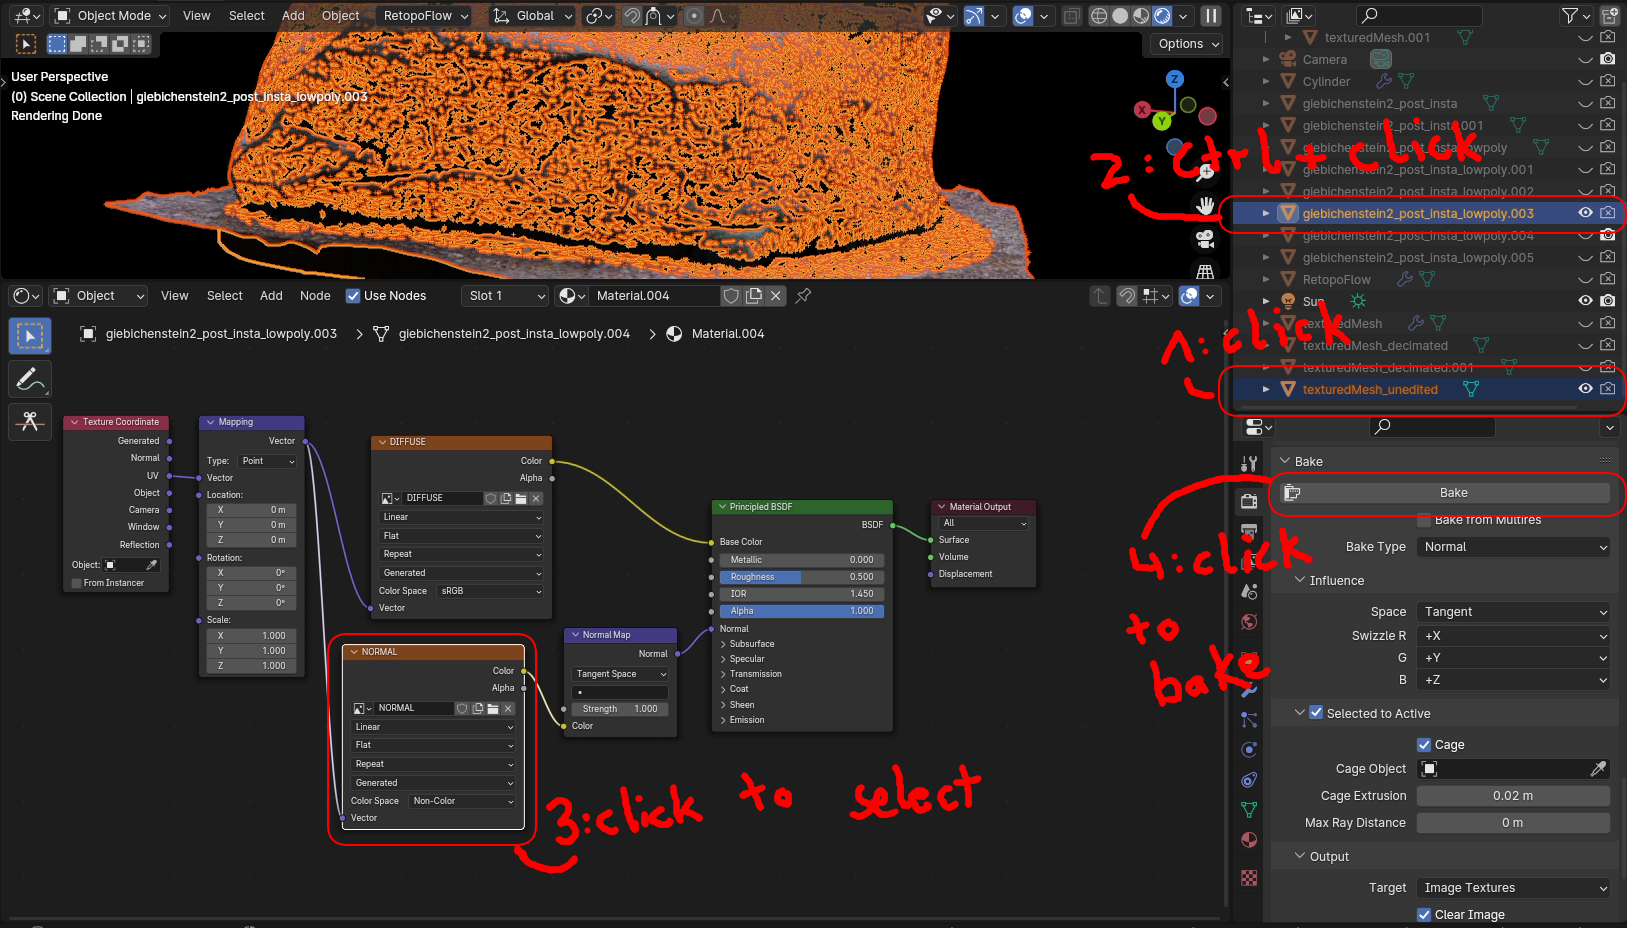
- Look out: the objects have to be visible in the render!

- Wait for the Bake of the normal texture zu finish:

- I had to refine some settings to get a satisfactory result. These settings can help you, if your normal map comes out wrong and 'too colorful'. You define a hull with them to 'probe' your model with and save this probed info onto the normal texture:
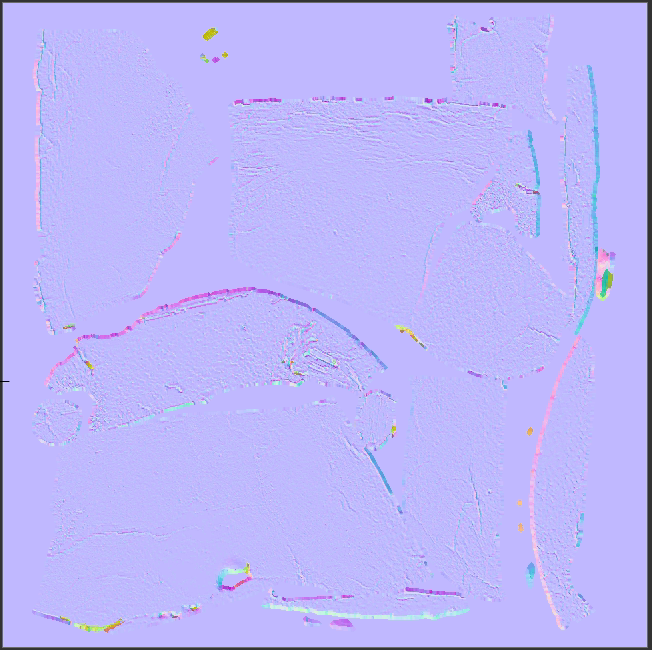
- I was not able to reproduce my original result exactly but a normal map like this might suffice, and you can still edit it afterward to get rid of any anomalies:
- Now for the regular 'diffuse' texture. Select the texture file in the shader nodes and change the 'Bake type' combo box to diffuse.
- The result might look like this:
- If we now take a look at our low res object (with only the normal texture enabled, but the diffuse texture disabled), we can see that we should fix some anomalies in the normal texture:
- I recommend using the clone tool in the Texture Paint mode to fix these spots:
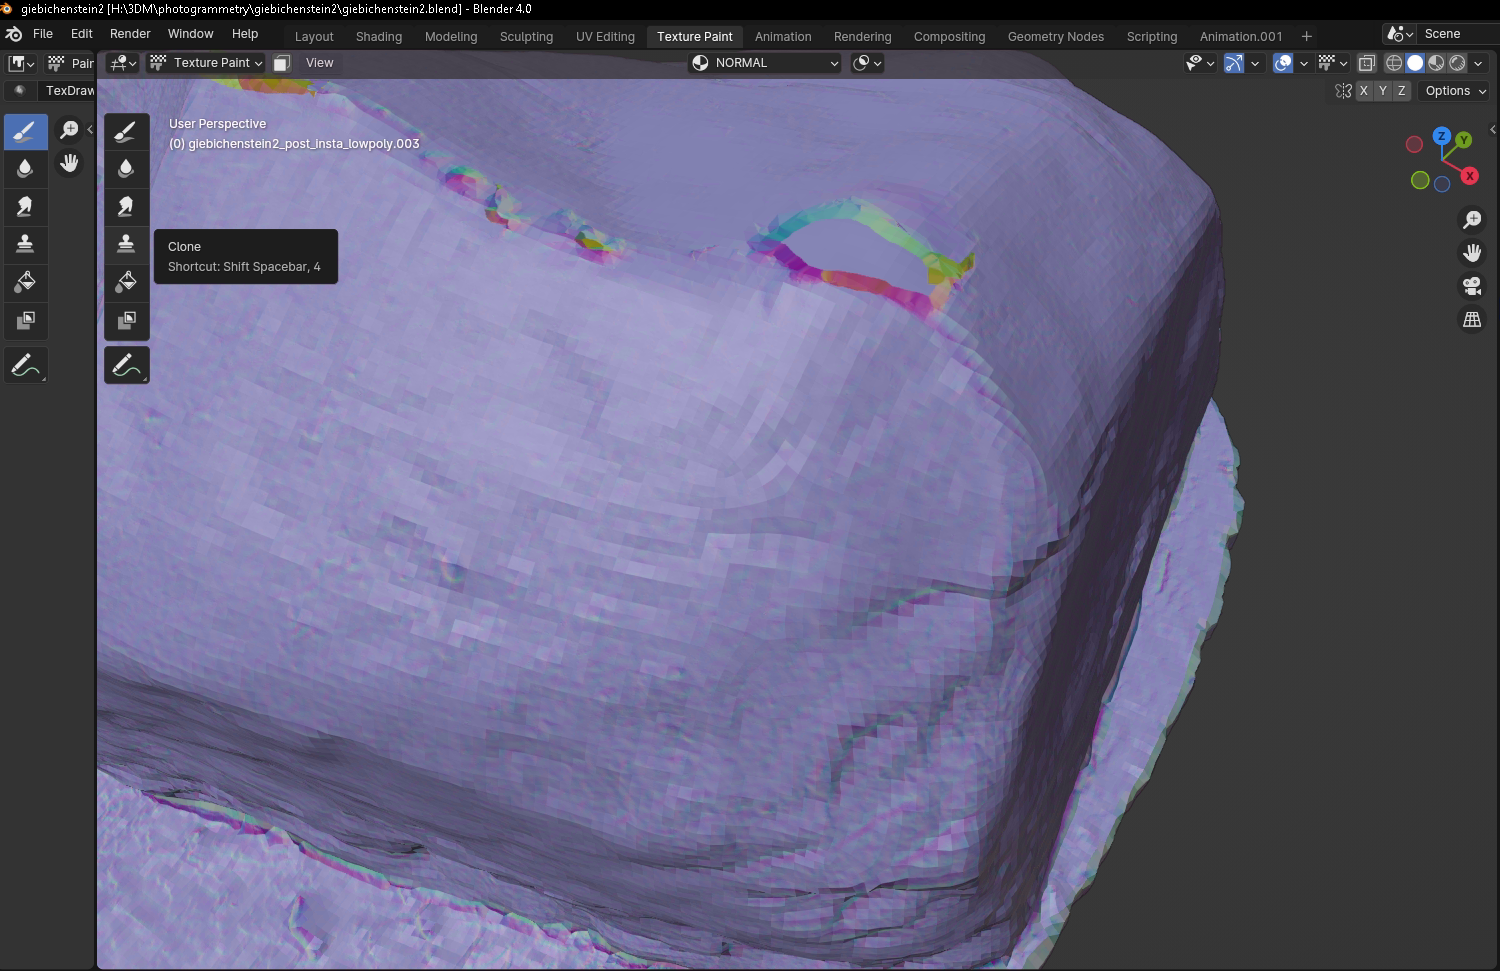 . The same goes for the diffuse texture.
 - After applying the normal and the diffuse texture in the shader view, we have a achieved it: a low poly but still high detail model of our photogrammetry object:
I hope this tutorial could be of help to someone with a similar project. If you would like to share your work, you can leave a comment with a link.